Week 42: Something completely different

Well I’d like to say that I achieved all my goals for the week, but in fact I achieved none of my sewing goals for the week. However, I had a friend in town this weekend, and she’s making costumes for her twin toddlers for Halloween this year, and I did help her trace and cut out fabric for those.


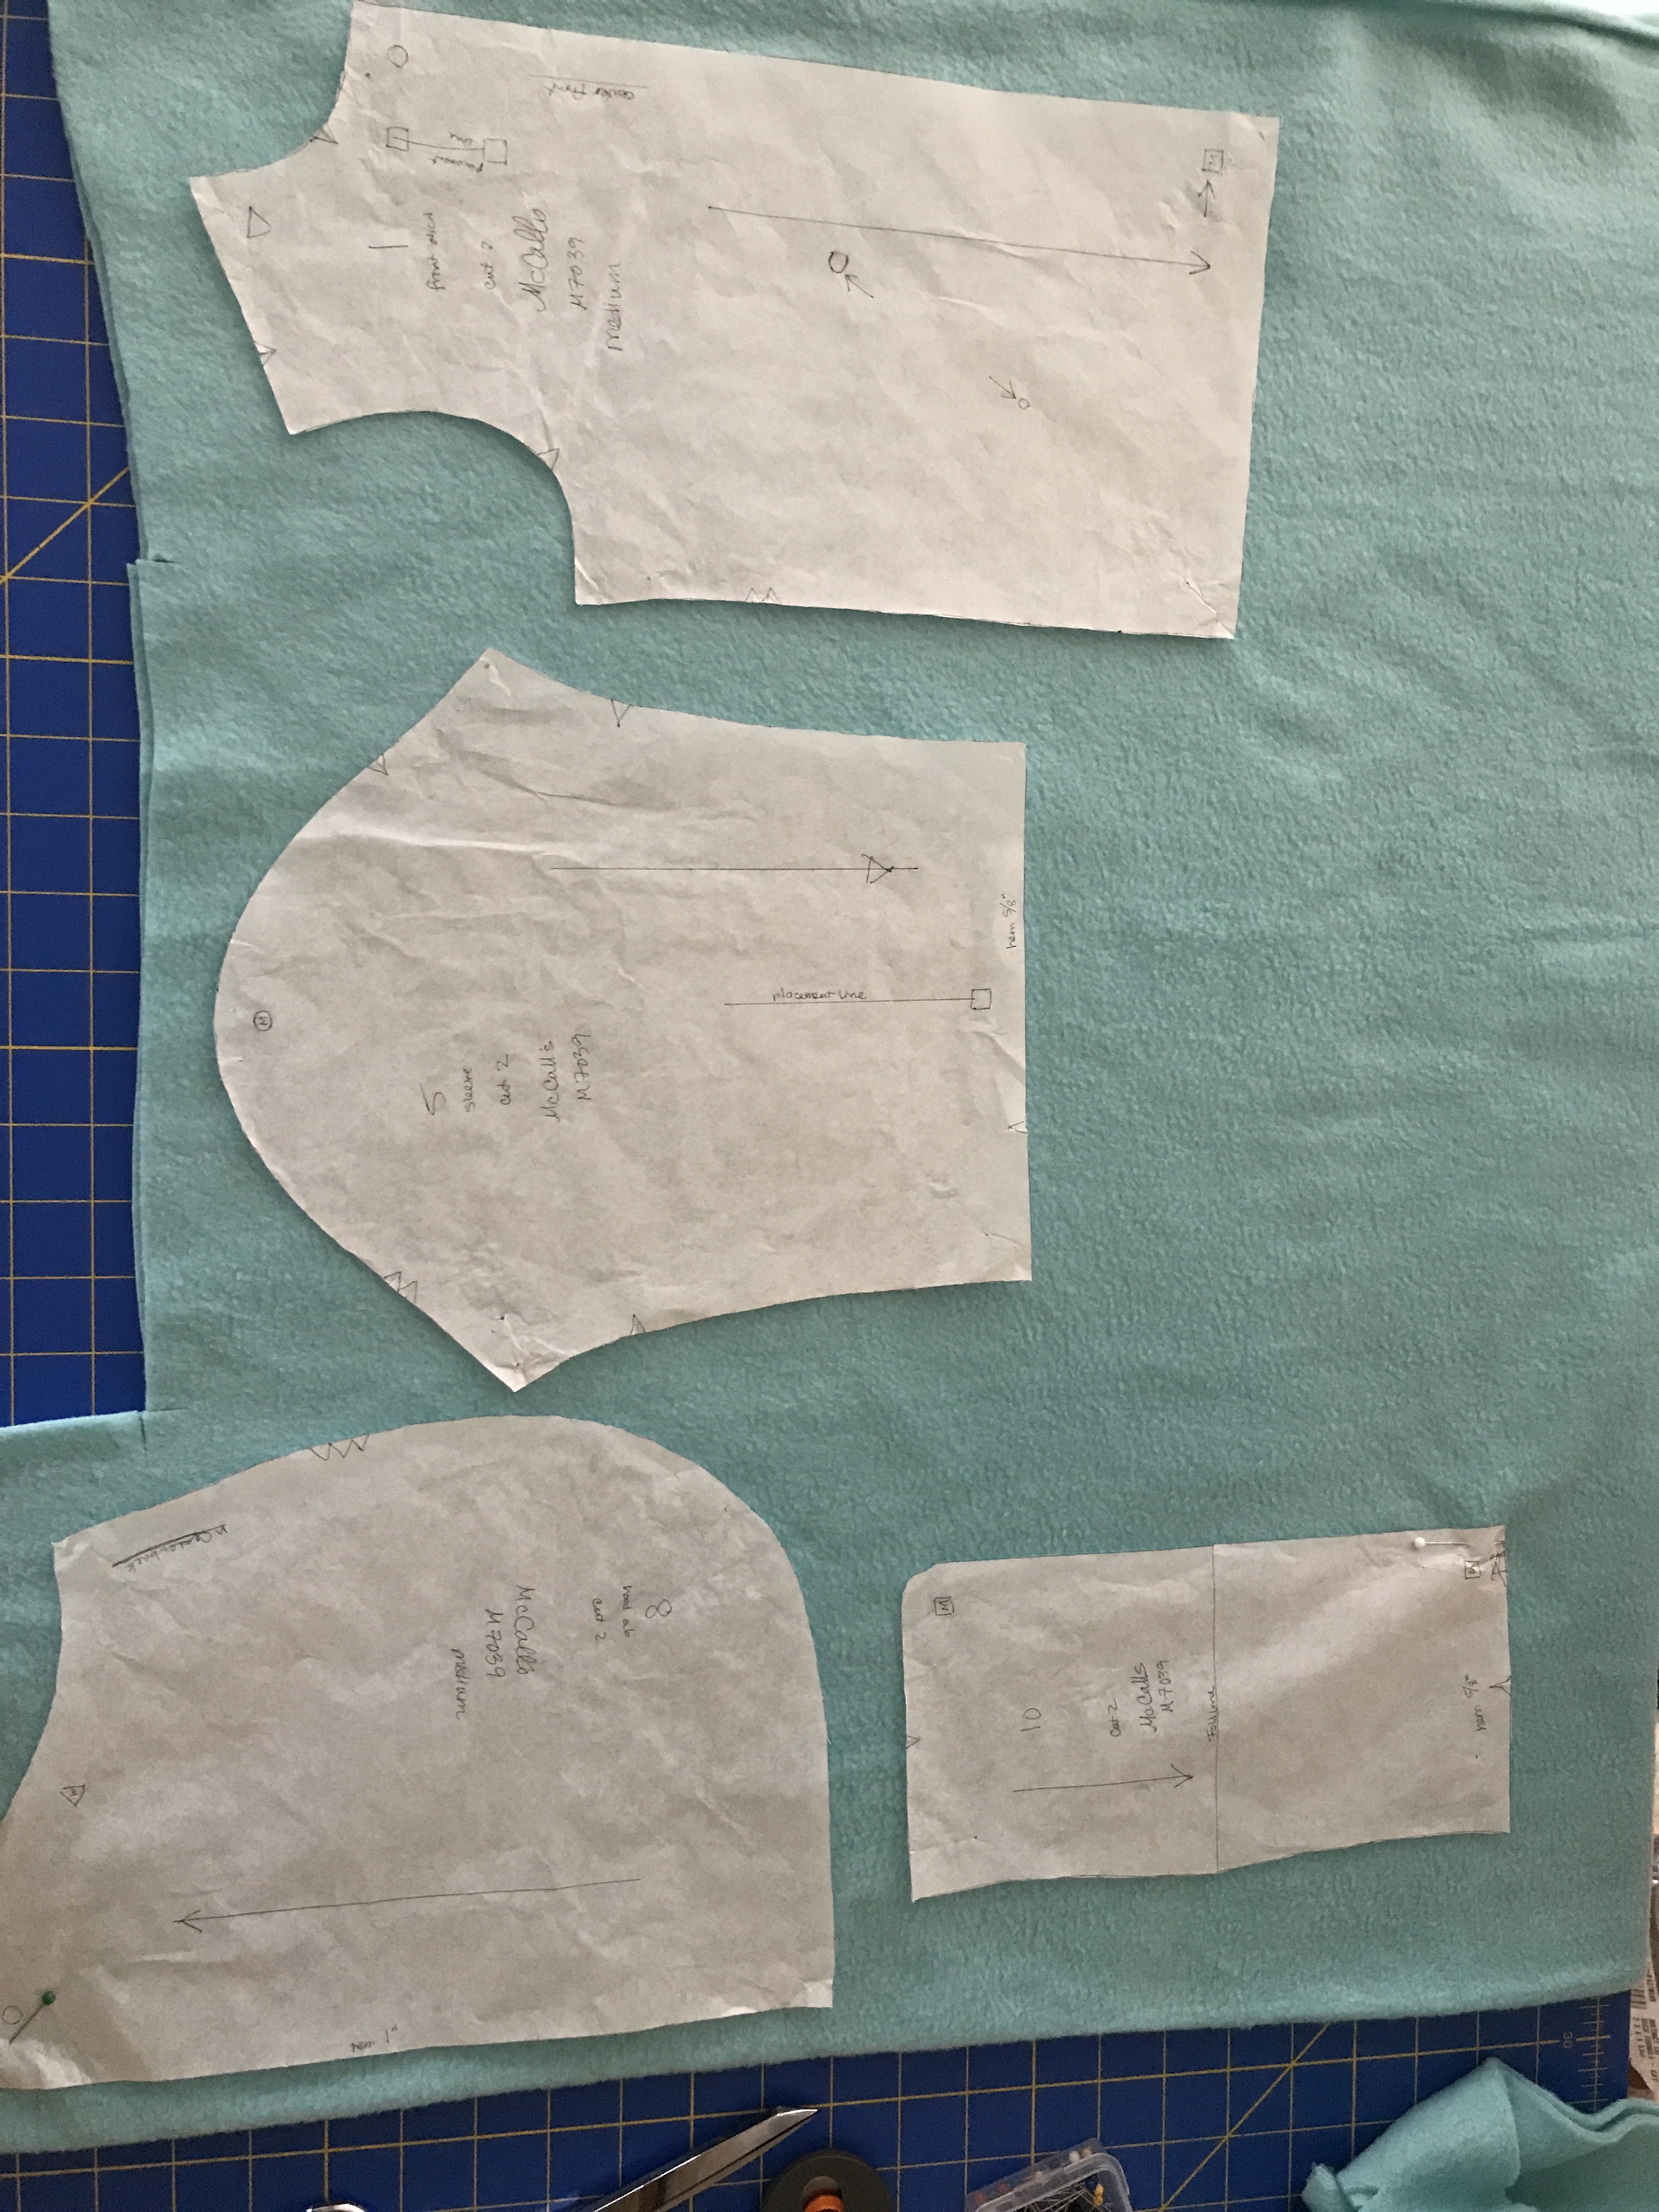
She’s making two hoodies and two pants out of polar fleece, which is not a material I’ve worked with before, and which was definitely a bit challenging to cut out and mark just due to the squishiness. She’ll be adding felt eyes and manes and tails and stuff in order to make My Little Pony costumes, which should be adorable as hell, and I’m looking forward to seeing how it works out!

Unfortunately, I only remembered to take one picture of the whole process, but it was involved, haha. I don’t envy her the task of finishing two hoodies and pants before Halloween, even if they are miniature. The last time I made my Halloween costume (in 2010 or so), I decided I was going to go as a dandy and started a tailored jacket October 1st without understanding how little I didn’t know. By the night of the 30th I had to give up on doing the lining because it wasn’t going to get done in time otherwise, and it didn’t go together right without the lining, and it didn’t fit quite right (shocker), and just in general it was such a terrible experience that I’ve been hesitant to commit to making a costume ever again.

I would love to do some cosplay (it’s part of why I keep throwing myself at pattern drafting and alteration, even though it makes me miserable when it fails), but if I’m going to do it I’m going to start six to eight months before whatever con I want to go to to leave myself plenty of time to find the right materials and figure out the patterns and everything.

I’m still planning to get my sister’s dress shortened before Thursday. I’m about halfway done ripping the seam on the flounce, so it’s definitely feasible, I just need to sit down and watch some tv and rip, rip, rip. After that, trimming off a few inches and re-stitching it shouldn’t take more than an hour (probably far less).

Goals for next week:

  • Attach the lining to the zipper!
  • Finish shortening sis’ dress FOR REAL THIS TIME


Week 30: Hemming and Instagram

It wasn’t a super productive week so far as actual output goes, but I did manage a few things!

First, I joined Instagram – I actually have never used Instagram, because I don’t normally take enough photos to make Instagram a viable social medium for me, but I started thinking it could be fun to have more process pictures there, and keep this space more for finished objects. (Today I’m just posting pictures I already put on Instagram, but I’d like to branch out more later.) My Instagram is here.

Secondly, I did indeed hem my yukata, and it’s my best blind hem yet, even with the fact that I started it off using a catch stitch (crossing the thread in an x shape) instead of a straight blind hem. Apparently the catch stitch is good for blind hemming knits, but the regular one is better for wovens? I’m actually glad, because it was seeming loopier than it should have been, and it laid much flatter when I switched stitches.

This is the right side of the above stitching, and you can’t see anything! I’m so pleased.

This wasn’t planned, necessarily, but I randomly decided it was finally time to put my skirt sloper pattern on poster board for future use. The remaining fitting problems I’ve had with the skirt I made from it are sewing and fabric problems, I’m pretty sure, rather than size. I’ll make another skirt from it here before too long just to double-check.


I also did some planning of my Belle wardrobe. I was watching Once Upon a Time before I went to Japan and I’m pretty inspired by most of Belle’s wardrobe. So I went trying to figure out what pieces I like the most and what their characteristics are, and I came up with a list:

  • Always emphasize the waistline – belts, seams, tucked in shirts
  • Ruffles/knots/interesting collar details draw attention to the neckline
  • Usually short sleeves or sleeveless
  • Textured fabrics: lace, quilting, houndstooth, etc

Keeping that in mind, I found a few patterns that I have already that I can use or tweak to give the impression I want. 

However! I’ve decided that I want to draft a bodice sloper before I make any more shirts – I’m excited to make skirts with my sloper to help fit, and I want to feel the same way about shirts!

Goals for next week:

  • Draft a bodice sloper 
  • First muslin for bodice sloper 
  • Knitting! Those socks aren’t gonna knit themselves. I don’t know how far I want to get, because I don’t want to burn out again, but I do want to make sure I do a little. 

Week 25: Pattern alterations

Firstly: I once again did not entirely finish off the last bits of the peach bra. I think my problem is just that I haven’t been able to decide how to finish it. I haven’t decided if I want to trim away the fabric behind the lace on the cups, or leave it and tack it down. And then I can’t decide if I want to take in the extra amount as a dart, knowing that it could be an uncomfortable seam to be right up against my breast. I really need to make those decisions and do the work this week, because I want that bra to come with me to Japan and it’s coming up real quick now.

I did successfully get all but one last thing on the nightgown done, though:

001 (2)

The neckline trim worked really well, and gives it a more polished look, even if it wants to turn out unpleasantly near the middle. I also hemmed it (by machine this time), so all I have left is to trim the back straps and then hand-stitch them under the back seam so they don’t fray.

I figure some night this week I’ll sit down with a movie and finish up all the hand sewing for both the bra and the nightgown.

What I did do for the bra, however, was move the needed alterations to the pattern. And I took a lot of process pics.

003

Here’s the amount that needs to be pinched out. I followed recommendations from the Craftsy comments last time in order to make my dart, but this time I decided to take out fabric where I need it. There was a very obvious pleat while wearing this, so I just traced the edges of it on both sides with my fabric marker. You can see it forms sort of a fishtail dart.

I measured where it started and ended, and placed the two relevant cup pieces together at the seams so I could mark it on the pattern:

002

I’m glad I did that bottom cup split last time, it makes for a very convenient ending point for my weird pleat.

004
Left is the 2nd draft, with the split cup and the initial cross-cup pleat taken out. Right is my new version, with a more substantial cross-cup pleat.

You can see that  the new version is much narrower to the left of the strap. I actually made one further modification after this that isn’t worth picturing – I had to take a 1/4″ dart out of the bottom cup to true up the seam lines.

It’s not worth ordering materials so close to my trip, but I think after I’m back I’d like to try out my new pattern modification. I have enough fabric left from the two kits I’ve ordered that so long as I’m willing to have a two-tone bra (spoiler alert: I am), I should just need to order the elastics and hardware, which will make it a much cheaper experiment.

As far as button-down shirts go, I decided on the Cashmerette Harrison pattern, largely because I’ve heard such great things about the fit. I’m a size 18 on top and between a 20-22 on the bottom, so I graded the pattern to a 20 and am hoping that the design ease will make up for the extra inch. I’m also planning to leave one-inch seam allowances on the sides to allow for anything I need to take in/out.

You’ll also notice that I traced off and shortened the sleeve pattern, because no way do I want long sleeves in July. I haven’t decided if I want to try to mod the cuff to work on the short sleeve or not. Given my time constraints, I’ll probably just hem it up and call it good. (I should probably add an actual hem allowance – I just sort of held up the sleeve at the shoulder and eyeballed where I wanted it to end, which means I probably don’t want to just cut the fabric there.)

006

Taping this together and cutting it out took way more time than I anticipated, and I think there are more pieces to this pattern than any pattern I’ve made before (with the possible exception of an ill-fated Halloween jacket I tried to make many years ago). I’ve also never sewn princess seams, and I haven’t sewn a collar in god knows how long. I’m pretty nervous about trying to get this done in a week (a week, that is all I have left, holy crap), and I don’t want to stress myself out too badly before the trip, so I may reach the end of the week and just say “You know… let’s not,” and call it good. WE’LL SEE.

The handsewing I have left really does need to get done by next week, though.

Goals for next week:

  • Bra: handsewing (around lace, dart) and closing up the underwire channels.
  • Nightgown: trim and hand-stitch the strap ends.
  • Harrison shirt: as much as possible! Hopefully the whole thing!
  • Pics of the wardrobe I’ll be packing


Week 24: Nightgown

The problem with cutting out fabric is that I usually want to start sewing immediately afterward.

Which is why the nightgown is almost entirely done, haha.

003

This fabric is 100% rayon, and it’s amazing how fragile it felt while I was working on it compared to how it felt when I tried it on. I’m not really convinced I made a good choice in using it for a nightgown, but I guess time will tell. (It’s almost too pretty to sleep in; I’m having second thoughts all over the place. But I certainly can’t wear it outside.)

It was a nightmare to cut. I don’t have a large enough cutting surface to hold the entire front skirt piece, and it was cut on the bias in a single layer, so trying to get it on the bias grain without stretching was a feat I only sorta succeeded at. The front skirt in particular wound up about half an inch shorter than it should have been, due to having to move the fabric around while it was pinned to the pattern. I have heard that spray starch is useful for keeping fabric from slipping around too much, so I might try that when I make something with the remainder.

Unsurprisingly, given the grading I had to do, the fit isn’t quite right – the cup size is a bit small, and the underbust actually wound up a bit too large – I took in the side seams and graded out under the waist to help a little, but it’s never going to be my best-fitting garment. Thank goodness it’s for sleeping.

I ran into some pattern weirdness on the bodice because I opted not to add lace like the pattern calls for, so I have a long front binding piece that I didn’t need at all, and I had to take out a row of stitching when I realized it was sewn wrong sides together so that it could have the lace attached to it. I went back and did french seams on the yoke instead, then top stitched them down to prevent the seams from flopping around.

The other problem that arose from not having any lace is that the 1/4″ seam allowance that they had me turn over in the first step is a raw edge, and even though I did a 3-step zigzag over it to try to keep it from fraying out, it’s going to fray a little bit right at the neckline unless I do something to stop it. Fortunately, I have some peach neckline trim elastic leftover from my peach bra (that I still haven’t done the finishing touches on…) that I think will work perfectly.

As for my sloper skirt, I finished it off on Sunday night, and then almost wore it out to coffee on Wednesday before I remembered that it still has fabric marker all over it, hah. I’m excited to see how it wears over the course of a full day.

I catch-stitched the hem, and you can see my hand overcasting on the seam edges, too. I left the side seams at 1″ in case I need to make future alterations.

004


The last thing I want to make before my trip is a short-sleeve button-down shirt. I have this blue and white seersucker that I think will be nice and cool for wandering around in humid weather (of which, I’m told, there will be plenty).

Goals for next week:

  • Find a button-down shirt pattern and make fitting adjustments
  • Hem and add neckline trim to nightgown
  • Peach bra finishing touches (this time for sure!)